If you ever needed to make an API call outside of your AWS account, you need to configure a few things on AWS. Below is the process to achieve that. I assume you already know how to configure your API gateway and are familiar with JavaScript and/or Python.
AWS Lambda 🔗
- AWS Lambda is an Amazon Web Services compute service that runs your back-end code in response to events and manages compute resources for you.
- The code running on AWS Lambda is called a Lambda function.
- You can write your code in the integrated Cloud9 editor within the AWS management console OR if your code requires custom libraries, you can create a .ZIP file containing all necessary components upload it as a codebase.
- You can also select from pre-built samples, or blueprints.
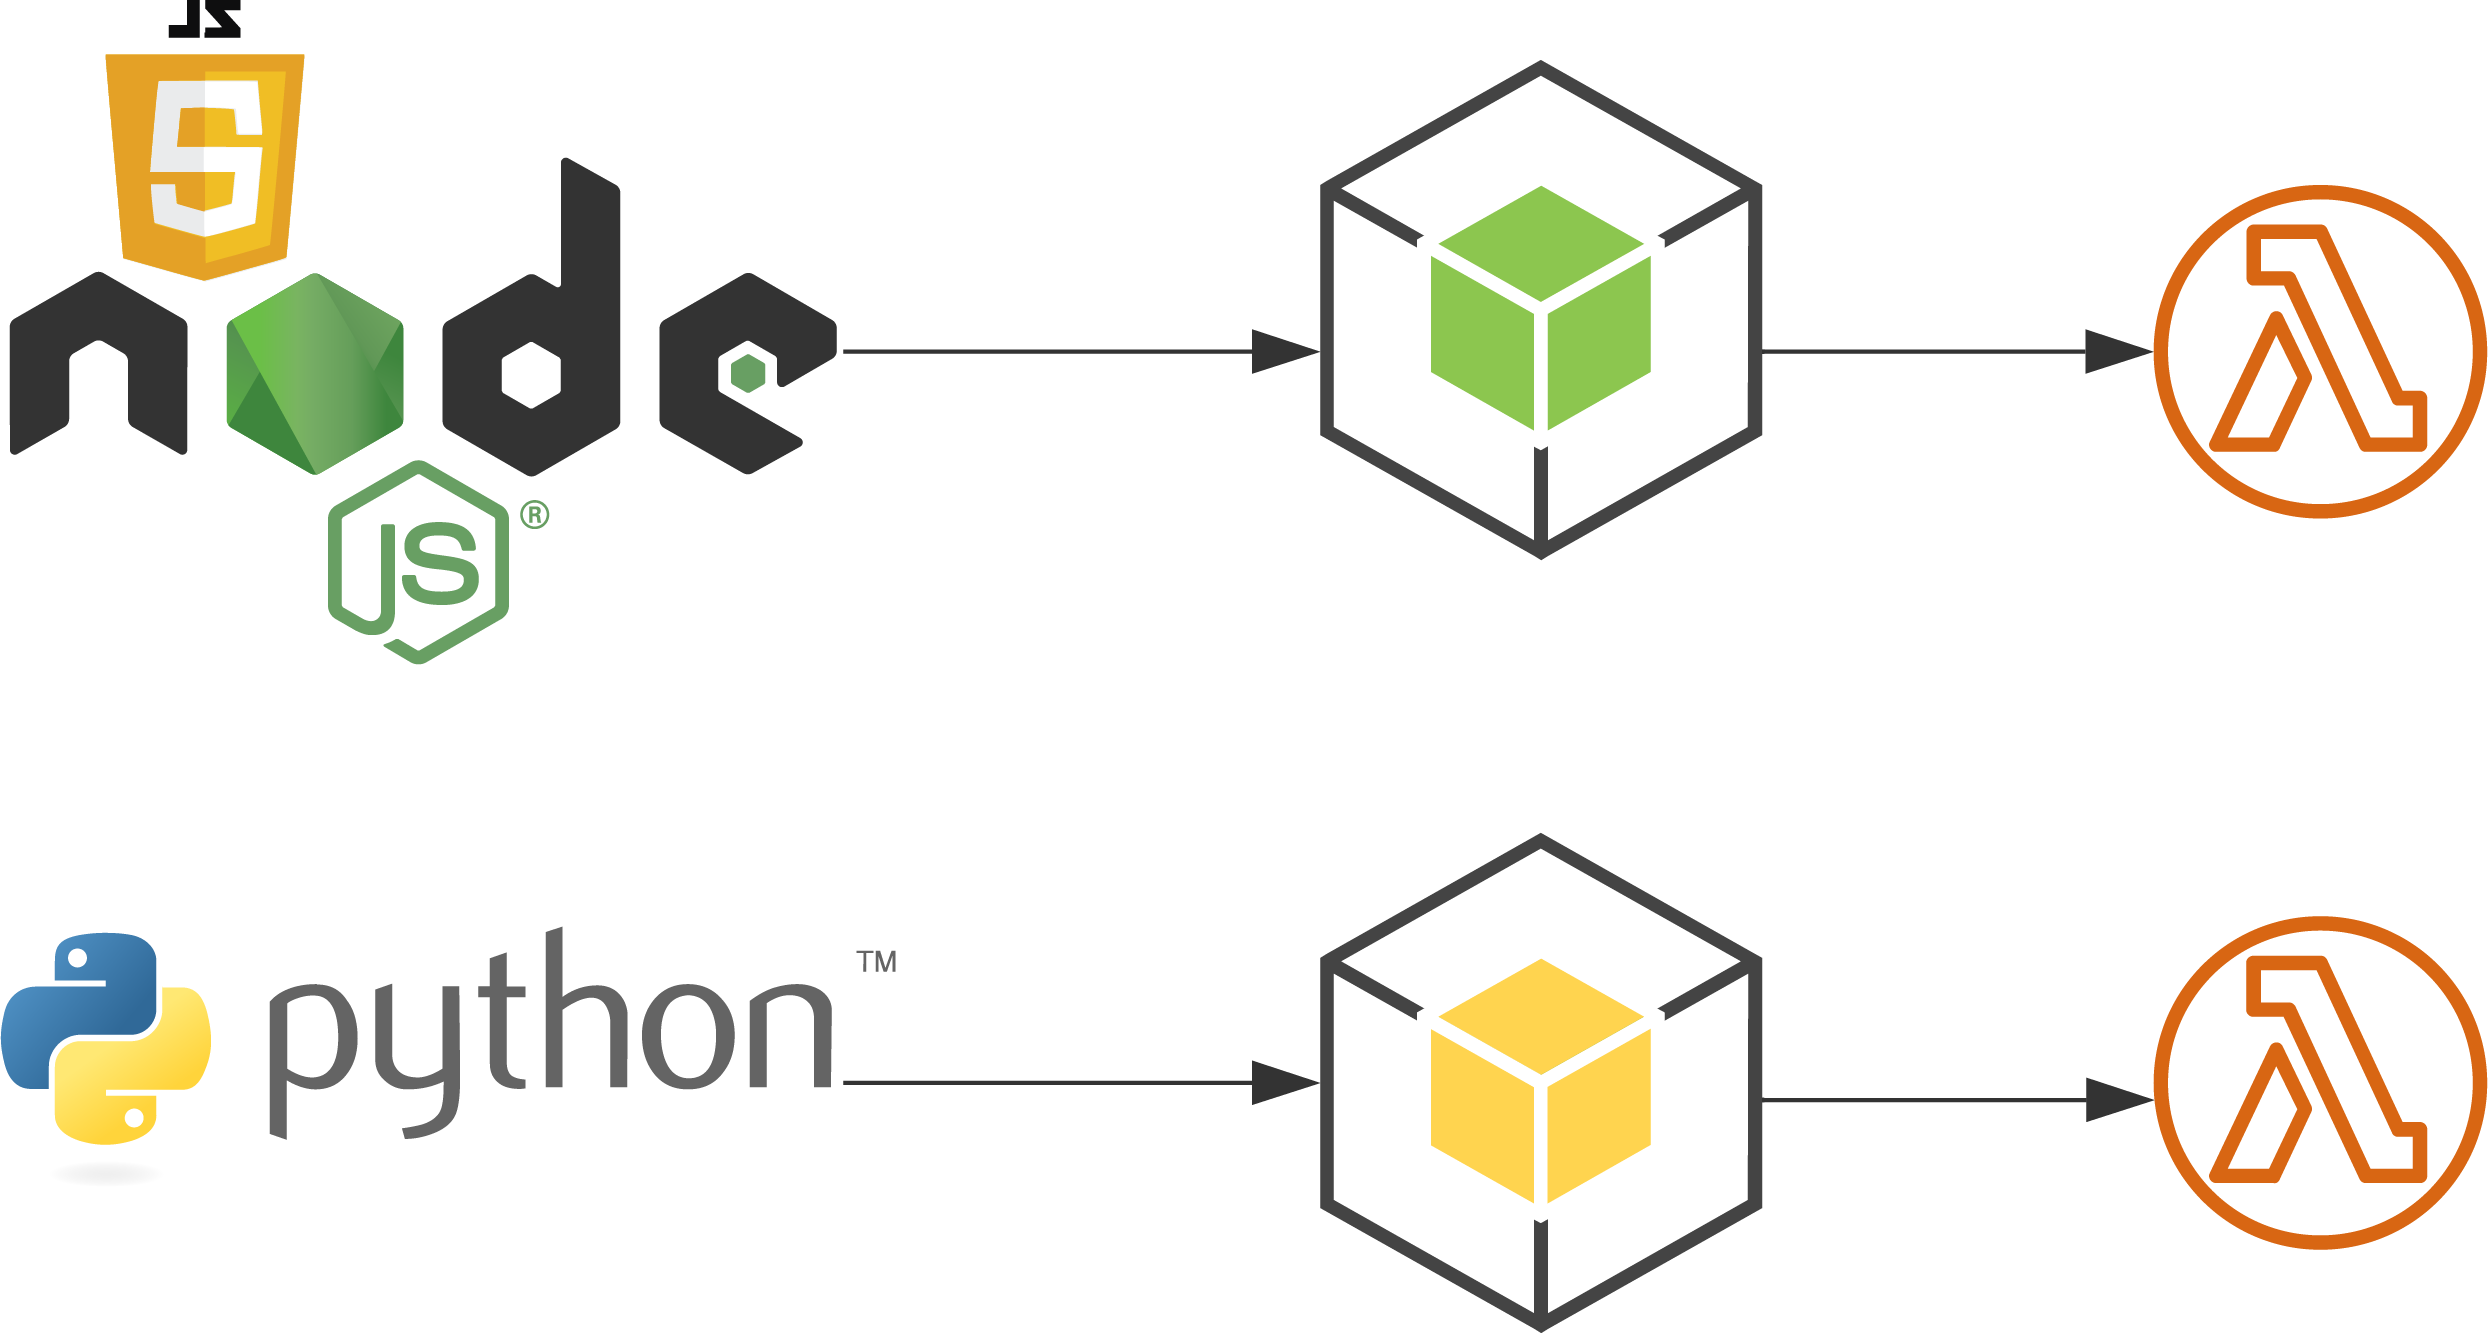
- Code can be written in JavaScript using Node.js, Python, .NET, Ruby, Go or Java.
- A Lambda function contains code, dependencies, and configuration information
- Configuration includes information like the handler that will receive the event, the AWS Identity and Access Management (IAM) role that AWS Lambda can use to execute the Lambda function
AWS Lambda can receive event data from multiple sources as shown below and perform various operations to provide required response.

To create a Lambda function 🔗
- Sign in to the Lambda console.
- Choose Create function.
- For Function name, enter
my-function. - Choose Create function.
The example function returns a 200 response to clients, and the text Hello from Lambda!.
The default Lambda function code should look similar to the following:
exports.handler = async (event) => {
    const response = {
        statusCode: 200,
        body: JSON.stringify('Hello from Lambda!'),
    };
    return response;
};
We can invoke Lambda Functions by integrating with following interfaces based on each use case:
- API Gateway : Amazon API Gateway is an AWS service for creating, publishing, maintaining, monitoring, and securing REST, HTTP, and WebSocket APIs at any scale.
- AWS SDKs : Provides language-specific APIs (for e.g : NodeJS - aws-sdk, Python - boto3).
- AWS CloudWatch Events : CloudWatch Events can invoke lambda function asynchronously with an event document that wraps the event from its source.
Calling Lambda function using an API Gateway 🔗

Now we’ll create a Lambda Function in Python3.8 to connect to DynamoDB and fetch some records.
You can create a table from DynamoDB Console
To access DynamoDB, from our Lambda function, we need to add Permissions to the Lambda function Role.
The example function returns a 200 response to clients, with data from the mentioned table.
import json
import boto3
from boto3.dynamodb.conditions import Key

def lambda_handler(event, context):
  # TODO implement
  dynamodb = boto3.resource('dynamodb')
  data = dynamodb.Table('test_table')
  response = data.scan()
  return {
    'statusCode': 200,
    'status': True,
    'data': response['Items']
  }
We will now create an HTTP API from API Gateway to receive requests from clients.
Steps 🔗
- Sign in to the API Gateway console
- Do one of the following:
- To create your first API, for HTTP API, choose Build.
- If you’ve created an API before, choose Create API, and then choose Build for HTTP API.
- For Integrations, choose Add integration.
- Choose Lambda.
- For Lambda function, enter
my-function. - For API name, enter
my-http-api. - Choose Next.
- Review the route that API Gateway creates for you, and then choose Next.
- Review the stage that API Gateway creates for you, and then choose Next.
- Choose Create.
Now you’ve created an HTTP API with a Lambda integration that’s ready to receive requests from clients.
To test your API 🔗
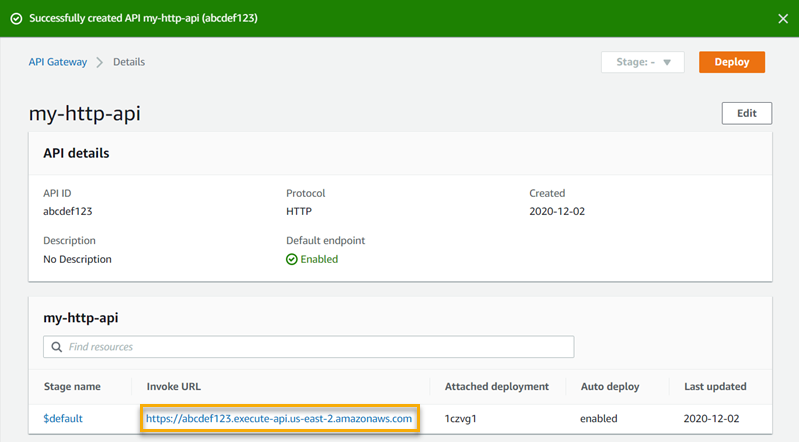
- Sign in to the API Gateway console
- Choose your API.
- Note your API’s invoke URL.
-
Copy your API’s invoke URL, and enter it in a web browser. Append the name of your Lambda function to your invoke URL to call your Lambda function. By default, the API Gateway console creates a route with the same name as your Lambda function, my-function.
The full URL should look likehttps://{account-id}.execute-api.{region-id}.amazonaws.com/my-function.
Your browser sends aGETrequest to the API. -
Verify your API’s response. You should see the response in above given format in your browser.
Calling Lambda function using an AWS SDK 🔗
Now we’ll create a Lambda Function in NodeJS to POST a request to any external API and will invoke this Lambda function from our Client side using AWS-SDK.
The example function returns a 200 response to clients, with data from the requested external API.
const https = require('https');

const getStatus = (defaultOptions, path, payload) => new Promise((resolve, reject) => {
    const options = { ...defaultOptions, path, method: 'GET' };
    const req = https.request(options, res => {
        let buffer = "";
        res.on('data', chunk => buffer += chunk)
        res.on('end', () => resolve(JSON.parse(buffer)))
    });
    req.on('error', e => reject(e.message));
    req.write(JSON.stringify(payload));
    req.end();
})

exports.handler = async (event) => {
    // TODO
    const defaultOptions = {
        host: event._hostname, //_hostname : example.com, passed from event as a parameter
        port: 443, // or 80 for http
        headers: {
            'Content-Type': 'application/json',
        }
    }

    var status_info = await getStatus(defaultOptions,event._pathname,''); //_pathname : /users/add, passed from event as a parameter

    // TODO implement
    const response = {
        statusCode: 200,
        body: JSON.stringify(status_info),
    };
    return response;
};
To invoke this Lambda function from Client side :
- boto3 - Python
import boto3
client = boto3.client('lambda',
          region_name=region_name,
          aws_access_key_id=aws_access_key_id,
          aws_secret_access_key=aws_secret_access_key)
payload = {"id:"id","name:"name","age":"age"}
result = client.invoke(FunctionName='myfunctionname',
          InvocationType='RequestResponse',
          Payload=json.dumps(payload))
- aws-sdk - NodeJS (CJS)
const AWS    = require('aws-sdk');
const lambda = new AWS.Lambda;
const payload = {"id:"id","name:"name","age":"age"}
var params = {
  FunctionName: "my-function",
  InvocationType='RequestResponse'
  Payload: payload
};
lambda.invoke(params, function(err, data) {
    if (err)
        console.log(err, err.stack); // an error occurred
    else
        console.log(data);           // successful response
});
Hence, we can use this response from our Lambda function.
Calling Lambda function using AWS CloudWatch Event 🔗
Now we’ll create a Lambda Function in Python3.8 to Send an Email Alert Everyday except Sunday at 9:30 am IST (4:00am GMT).
To Schedule this, we will use Cloudwatch Events
-
Pre-requisites:
- Verified Source Email to Send Email From To Know More
- Permissions for Lambda Function to Send Email:
{
     "Effect": "Allow",
     "Action": [
        "ses:SendEmail",
        "ses:SendRawEmail"
     ],
     "Resource": "*"
}
🧮 send-email.py
import jsonimport osimport boto3from botocore.exceptions import ClientErrorfrom email.mime.multipart import MIMEMultipartfrom email.mime.text import MIMETextfrom email.mime.application import MIMEApplicationdef lambda_handler(event, context): # TODO implement # Replace sender@example.com with your "From" address. # This address must be verified with Amazon SES. Add here the email address you verified in step 4 SENDER = "user@example.com" # Replace recipient@example.com with a "To" address. If your account # is still in the sandbox, this address must be verified. #RECIPIENT = "recipient@example.com" # Specify a configuration set. If you do not want to use a configuration # set, comment the following variable, and the # ConfigurationSetName=CONFIGURATION_SET argument below. #CONFIGURATION_SET = "" # If necessary, replace us-west-2 with the AWS Region you're using for Amazon SES. AWS_REGION = "<region>" # The subject line for the email. SUBJECT = "Sample Test Email using Lambda function and SES" # The full path to the file that will be attached to the email. #ATTACHMENT = "" # The email body for recipients with non-HTML email clients. BODY_TEXT = "Hello,\rThis is a sample email to test working of Amazon SES using Lambda function" # The character encoding for the email. CHARSET = "utf-8" # Create a new SES resource and specify a region. client = boto3.client('ses',region_name=AWS_REGION) # Create a multipart/mixed parent container. msg = MIMEMultipart('mixed') # Add subject, from and to lines. msg['Subject'] = SUBJECT msg['From'] = SENDER msg['To'] = 'user1@example.com' msg['CC'] = 'user2@example.com' # Create a multipart/alternative child container. msg_body = MIMEMultipart('alternative') # Encode the text and HTML content and set the character encoding. This step is # necessary if you're sending a message with characters outside the ASCII range. textpart = MIMEText(BODY_TEXT.encode(CHARSET), 'plain', CHARSET) #htmlpart = MIMEText(BODY_HTML.encode(CHARSET), 'html', CHARSET) # Add the text and HTML parts to the child container. msg_body.attach(textpart) #msg_body.attach(htmlpart) # Define the attachment part and encode it using MIMEApplication. #att = MIMEApplication(open(ATTACHMENT, 'rb').read()) # Add a header to tell the email client to treat this part as an attachment, # and to give the attachment a name. #att.add_header('Content-Disposition','attachment',filename=os.path.basename(ATTACHMENT)) # Attach the multipart/alternative child container to the multipart/mixed # parent container. msg.attach(msg_body) # Add the attachment to the parent container. #msg.attach(att) #print(msg) try: #Provide the contents of the email. response = client.send_raw_email( Source=SENDER, Destinations=[ #RECIPIENT msg['To'],msg['CC'],msg['BCC'] ], RawMessage={ 'Data':msg.as_string(), }, #ConfigurationSetName=CONFIGURATION_SET ) # Display an error if something goes wrong. except ClientError as e: print(e.response['Error']['Message']) response = { 'statusCode': 500, 'message': 'Email Not Sent, '+e.response['Error']['Message'] } else: print("Email sent! Message ID:"), print(response['MessageId']) response = { 'statusCode': 200, 'message': 'Email Sent' } return responseTo create CloudWatch Event - Rule - to schedule Lambda function invocation 🔗
- Go to Cloudwatch console.
- Go to Event -> Rules
- Create Rule
- Add details as shown below:
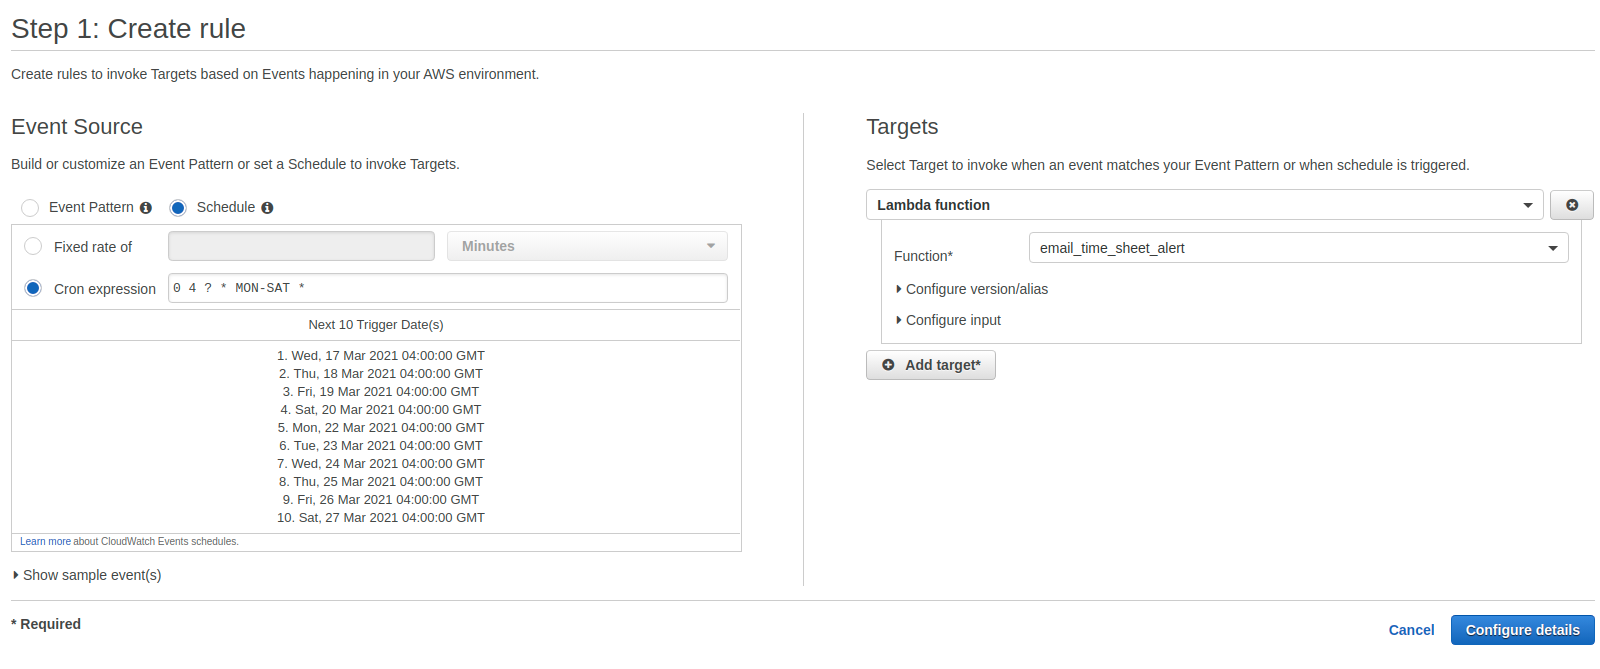
Click on Configure details, your Lambda invocation will be scheduled.