Intro 🔗
This is part two of a mini series on my journey to build my own blogging site without using WordPress or any blogging site like Tumbler or Medium. I want full control of my published thoughts. This includes if and how I should share my data with advertisers and crawlers.
I assume you are comfortable with using AWS, git, VScode, and docker. There are other sites that discuss how to get started with AWS, GitHub and programming.
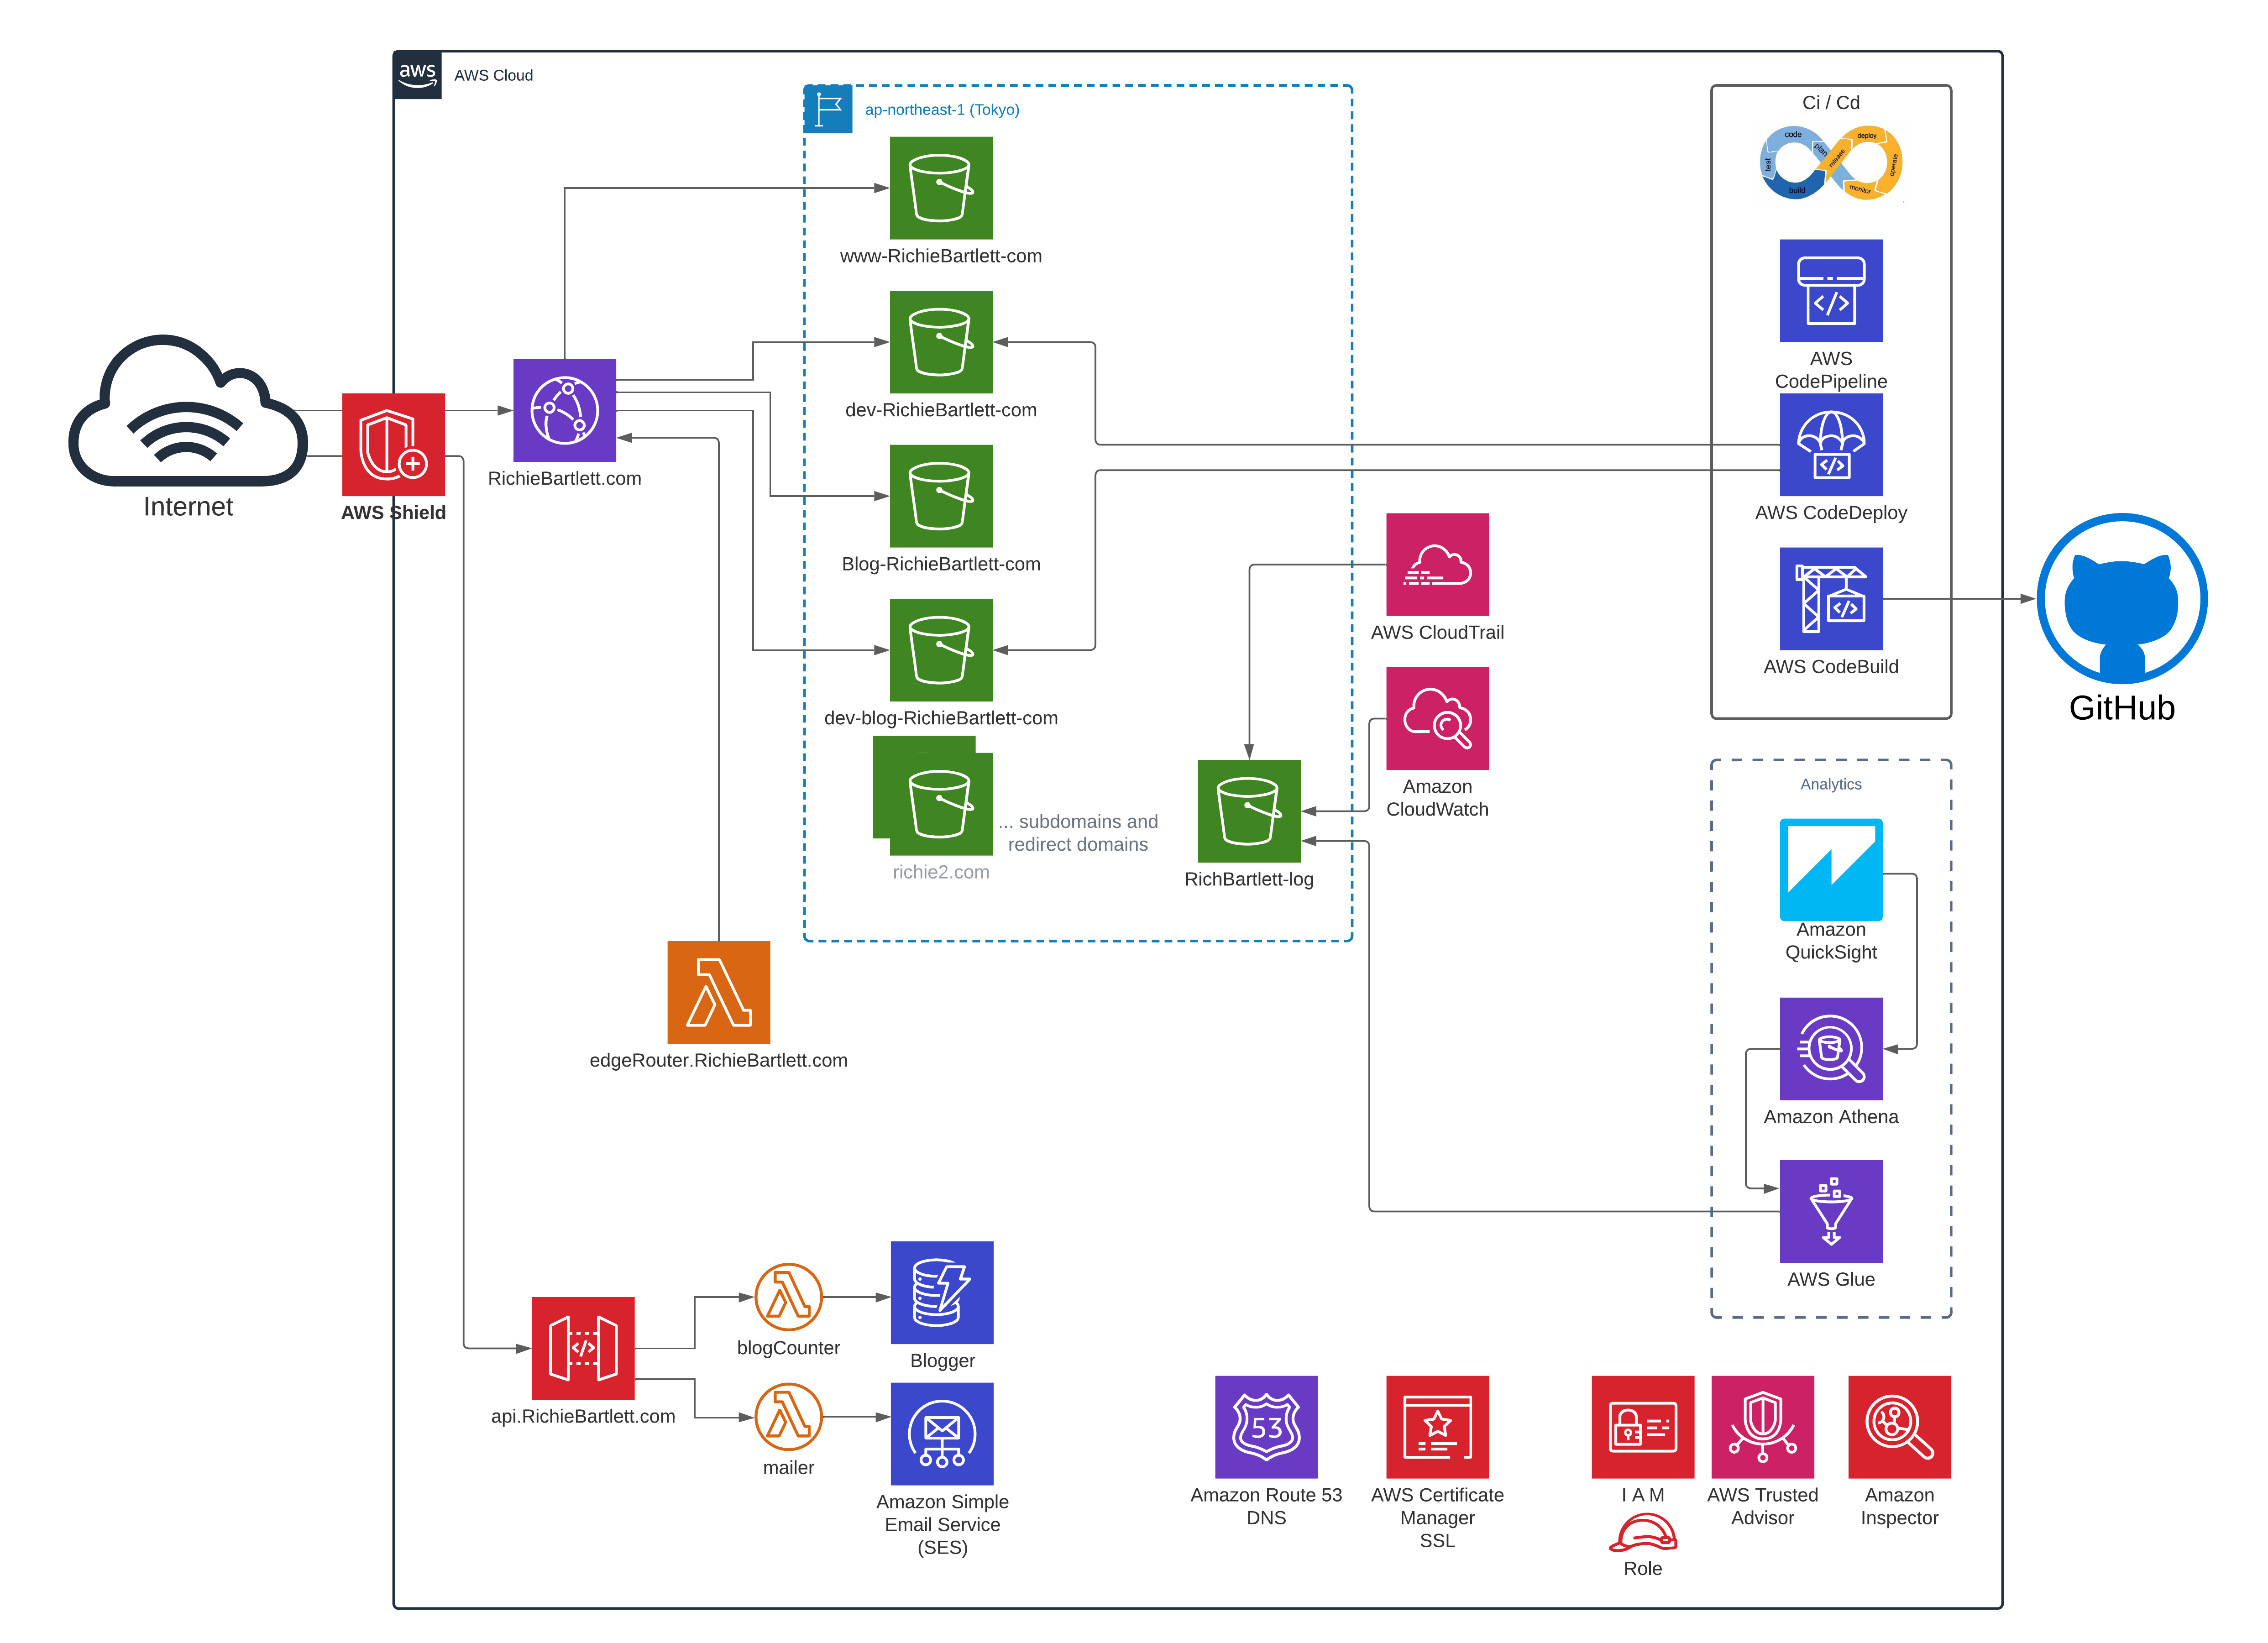
Architecture Diagram 🔗
Tools 🔗
CloudFront LambdaEdge scripts 🔗
- pull script from git repo
- publish to AWS Lambda (US-1:Virginia)
- add trigger to CloudFront
Pipeline infrastructure 🔗
- GitHub
- Docker
- Amazon ECS & ECR
- AWS S3
- AWS Lambda
- AWS CodePipeline
- Amazon SNS
- Amazon SES
- Amazon DynamoDB
Containerization 🔗
- Install docker locally
- Setup environment
- Build the container
- Push to ECR
Build the Prod pipeline 🔗
This is the branch that hosts the live website. When you visit my blog, you are viewing the production code. This branch will have all the features that passed code review, multiple test users, multiple test devices for various screen sizes, and SEO verification.
Production requires minimizing the amount of data sent across the networks. As such, the website must have all the comments and white-space removed. Furthermore, the scripts must be minified and obfuscated.
- Setup CodePipeline to detect new push.
- Run docker and rebuild environment
- Obfuscate the JS code
- Minify HTML, CSS, and JS
Pipeline logic 🔗
- Listen for repo push updates (via EventBridge)
- Run ECS instance (from Lambda)
- Pull latest code from origin branch
- Run automation scripts
- Update website storage
automation scripts 🔗
- download the github repo
- update nodeJS
- Update NPM (packages to latest stable)
- Install/update the node modules for project
- run:
npm run build - remove comments and minify / uglify all code
- empty the S3 bucket (only 1x a month; otherwise, overwrite)
- compile the website. If error, abort S3 updates and send notification
- Copy
/public/folder to S3 - Invalidate the CloudFront cache
- Send completion notice.
Dev pipeline 🔗
The development environment employs only a handful of my posts while focusing on feature rollouts. They don’t need a lot of RAM or CPU to compile the site. This makes it very easy for my development team to build the site and test it before code review and production.
This environment is very basic and simple. To accommodate the troubleshooting process, all comments and scripts are left intact. No minification or uglifying (obfuscation).
PreP pipeline 🔗
The pre-production (or PreP) environment combines the codebase from the dev branch and all the posts (plus assets) from production. This is the ultimate test environment for how the site would feel and perform. If a feature that worked in dev fails here, it doesn’t get rolled to production. Again, No minification or uglifying (obfuscation).
Reference 🔗
- Build & Push Docker Image to AWS ECR using GitHub Actions
- How to Build and Push Docker Images to AWS ECR
- 🎥 Create a CI/CD pipeline on AWS using CodeCommit, CodeBuild, CodePipeline and Lambda functions
- 🎥 AWS DevOps CI/CD | CI CD Setup Using CodeBuild CodePipeline ECS | ECS Fargate | CI CD Setup
- 🎥 Top 8 Docker Best Practices for using Docker in Production
- How I Used Docker to Deploy a Static Website and Saved Its Data to an S3 Bucket
- Amazon S3 cache
- Create a static website with build output hosted in an S3 bucket
- Tutorial: Amazon ECS Standard Deployment with CodePipeline
- CI/CD pipeline for testing containers on AWS Fargate with scaling to zero
- Automate building Docker Containers for Fargate using CodeBuild
- A Deep Dive into GitHub Actions’ Reusable Workflows
- Quick CI-CD from Github to Prod with AWS ECR, ECS creating a serverless Docker container
- How-to dump your Docker-ized database on Amazon S3?
- Deploying Docker Containers Using an AWS CodePipeline for DevOps