

Full demo code available:
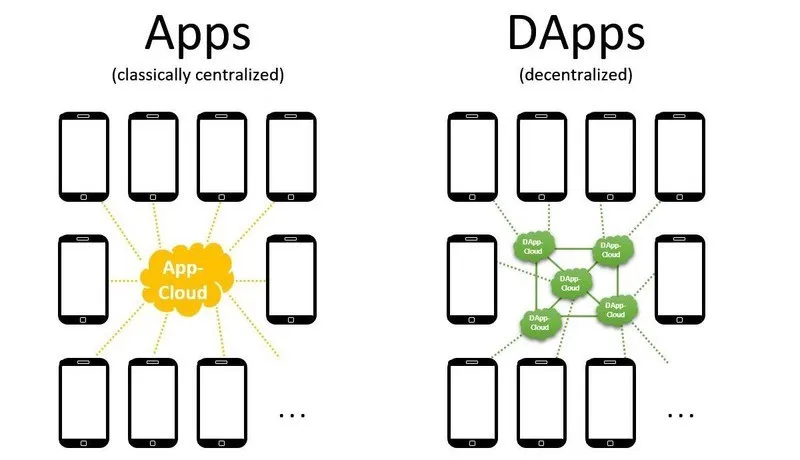
We often hear about cryptocurrencies, blockchains, wallets and even more in the future we will hear about tokens, Smart contracts and decentralized applications (DApps).
The purpose of this tutorial is not to analyse these concepts (the web is full of useful resources to explore them) but rather to take your first steps in this world by following these simple points:
- Define your first Smart contract
- Use it by instantiating a blockchain locally
- Interact with it through a simple web DApp
It all seems very simple doesn’t it? Let’s get started!

Define a Smart contract 🔗
The most simple and immediate definition I found on the web, which in my opinion summarizes the true essence of this concept, is the following:
As a first example I thought to use Solidity, a statically typed programming language designed for developing smart contracts that run on the Ethereum Virtual Machine (EVM). It uses a Javascript (actually ECMAScript)-like syntax with some “influence” coming from C/C++. Don’t forget to check out the legendary Cryptozombie tutorial on Solidity 🚀🚀🚀!
Our first smart contract is very simple and to implement it, without installing any tool on your machine, we will use Remix IDE a specific editor for Solidity usable directly from our browser by clicking here!

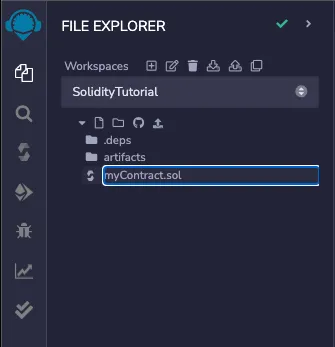
In the File Explorer bar (on the left side of your screen), create a dedicated Workspace and the add a file at the root level (myContract.sol in my case):
Paste the following code in the editor:
// SPDX-License-Identifier: MIT
pragma solidity ^0.8.0;

contract MyContract {

    string public name = 'Jonny';
    uint public age = 39;

    function setOwner(string _name, uint _age) public {
        name = _name;
        age = _age;
    }

   function getOwner() public constant returns (string, uint) {
       return (name, age);
   }

}
The first line declares the SPX license identifier under which the contract is published (details here), while the pragma keyword is used to avoid incompatibility with future compiler versions (more details here).
As you can see it’s a simple “class” MyContract (i.e. the contract itself) with two instance variables and two simple methods to obtain and set their values from the outside (notice the public visibility modifier).
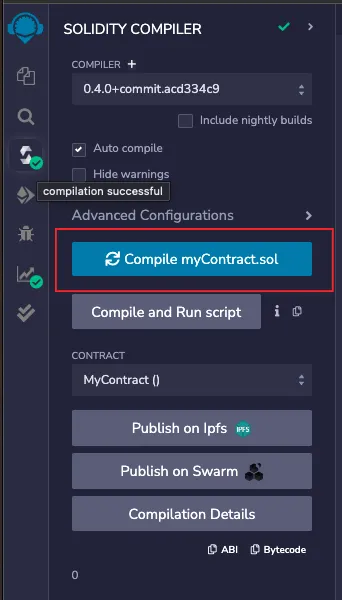
We can then move on to the first run, switch to the “Solidity compiler” tab and click the “Compile myContract.sol” button
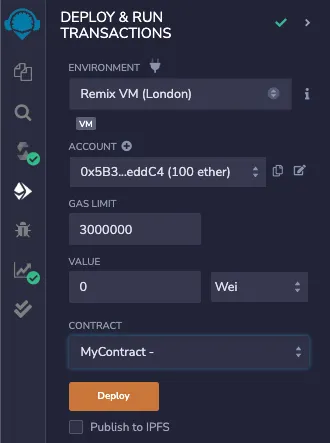
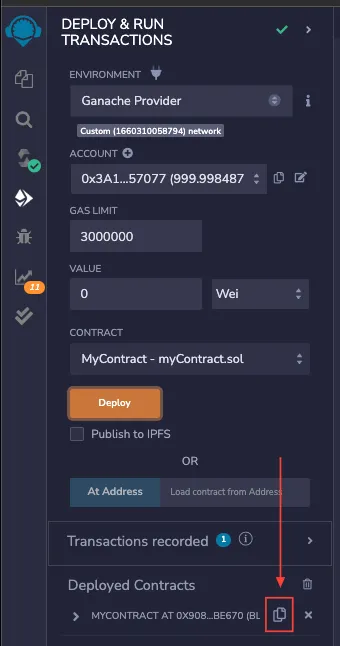
Then switch again to “Deploy & run” tab: the environment should be already selected, just click “Deploy” button and forget about the other details.
Under the “Deployed Contracts” section (yes, in the same Deploy & run tab) you should see your first contract ready to interact with you.
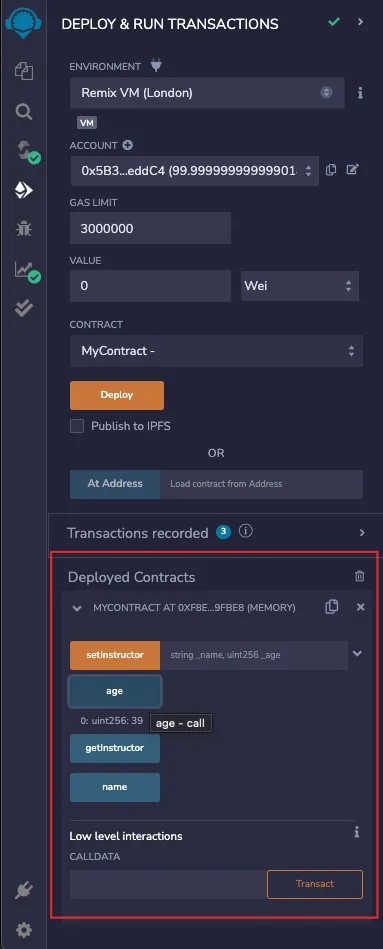
As you can see Remix provides some buttons to be able to interact already in this first phase with our newly published contract, cool right?
Wait, we just said “published”, but where? Actually Remix has not published our first creation on a real public blockchain, this would have entailed a computational cost, which in the blockchain is a fundamental concept, and on the blockchain, as in life, any action has a cost that must be paid by someone (and we are not the ones 😅).
Since we just want to learn, Remix instantiates a lightweight blockchain directly within our browser (fantastic isn’t it?) thus we can do all the tests we want. However, to make our contract usable locally we have to instantiate a blockchain reachable by and external application (i.e. our web app, ehm… DApp pardon, which we still have to do). Here we are at the next step.

Instantiate a “local” blockchain 🔗
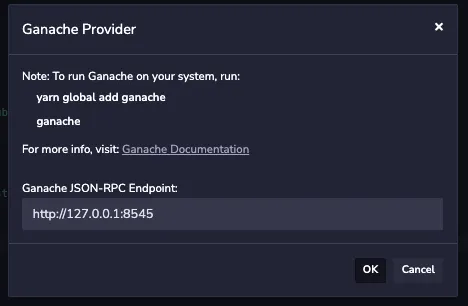
Ganache is a very useful tool that allows us to instantiate a local blockchain for rapid Ethereum DApp development with a few simple commands. In this case we will use the CLI version, but don’t miss the rich UI of the desktop application and the other tools provided by the Truffle Suite!
Assuming that you already have Node.js and npx installed on your system, create a folder for our project (I chose web3) and just give the following commands from your preferred terminal/console app:
npx ganache-cli
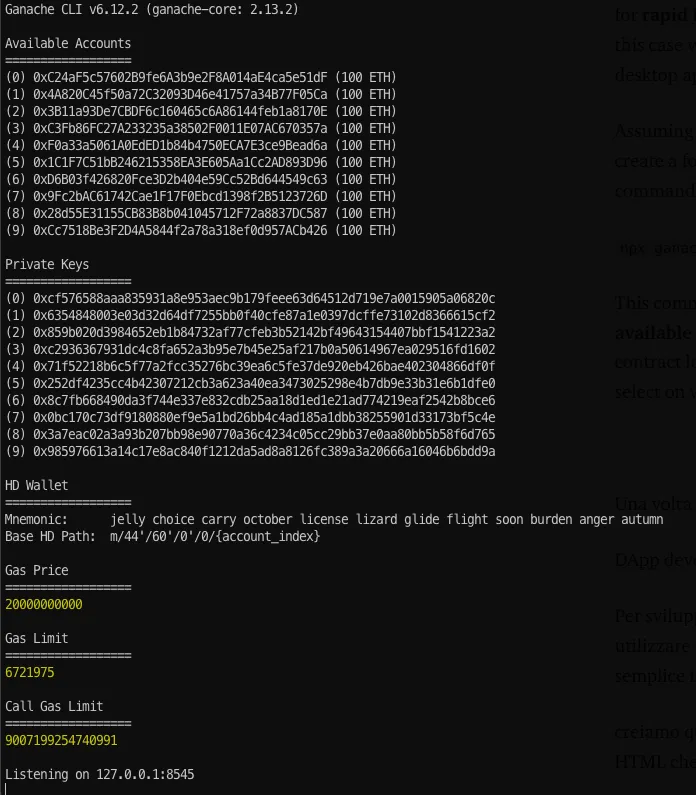
This command immediately starts a virtual Ethereum blockchain with 10 available accounts: in this case we will only one to allow us to publish our contract locally. To do this let’s go back to “Deploy & run” tab on our excellent Remix editor and select on which destination to publish our smart contract.

Once published we just have to invoke it from our new DApp.
Develop a DApp 🔗
To quickly develop the DApp and get immediate feedback, I thought about using a vanilla javascript script (plus some HTML); at the same time we will see how simple it can be to interact with a Smart contract.
So let’s create a folder for our very simple app: an index.html file that will act as the front page while invokeContract.js will collaborate with constants.js to interact with our first Smart contract.
mkdir simpleHtml && cd simpleHtml

#Quick linux-mac hack to create files -> skip if on Win
touch index.html invokeContract.js constants.js
Below is the content of each file:
index.html 🔗
invokeContract.js 🔗
import { CONTRACT_ABI, CONTRACT_ADDRESS } from './constants.js';
function connect() {
// Create a new web3 instance specifying the local "Ganache provider"
const web3 = new Web3(new Web3.providers.HttpProvider('http://127.0.0.1:8545'))
// Take the first account
web3.eth.defaultAccount = web3.eth.accounts[0]
// Create a new contract instance using the ABI and the address
window.contract = new web3.eth.Contract(CONTRACT_ABI, CONTRACT_ADDRESS)
}
function invokeContract() {
window.contract.methods.getOwner()
.call()
.then(result => {
document.getElementById('status').innerHTML = ``
})
}
setTimeout(() => {
connect()
document.getElementById('status').innerHTML = 'Invoking contract method...'
// Add some suspense to the demo before invoking the contract
setTimeout(() => invokeContract(), Math.random() * 10000)
}, 2000)
As you can see (line 10 of index.html and line 6 of invokeContract.js) we use Web3.js, a library dedicated to managing the interaction between browsers and the Ethereum blockchain: actually it is a collection of libraries that allow you to perform actions like send Ether from one account to another, read and write data from Smart contracts, create smart contracts, and so much more!
The rest of index.html is the classic “content display”, the only part that will be updated is the h1 tag on line 26. It will be changed by invokeContract.js after the connect method (line 24) and during the getOwner().call (line 19).
So how do we properly instruct the library to use our very “complicated“ contract?
Actually, after specifying our provider (line 6 of invokeContract.js), it is sufficient to set the address of the contract (a sort of unique URI to “find” our contract in the blockchain) and its ABI (a sort of simple JSON “descriptor/interface” of our contract) -> we can find this information directly on Remix and we can store them in a separate file (see constants.js below) to keep our project tidy and clean 😉.

constants.js 🔗
const CONTRACT_ADDRESS = "0xa92e03A6672B92556134b0BfBe1F96bFE5536862";
const CONTRACT_ABI =
  [
    {
      "inputs": [],
      "name": "age",
      // rest of your ABI here ...
    }
  ];
Ok we are ready to interact with our Smart contract, we need to make our index.html callable by our browser through a simple and light web server (I added timeouts to make the query phases understandable), so type on your favourite your preferred terminal/console app:
npx http-server
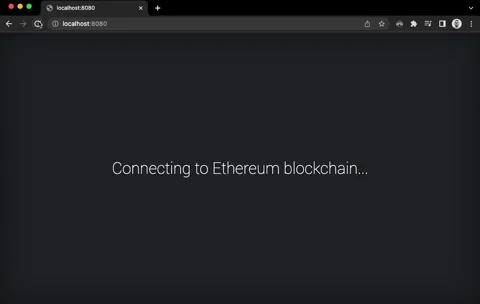
Point your browser on http://127.0.0.1:8080 and here we have our first DApp!!!
As you can see we can obviously also save information within the blockchain: try to change the values using the Remix buttons (as before, under the “Deployed Contracts” section in “Deploy & run” tab) and take a look at the log of the ganache instance, then refresh your page!
Congratulations, you have just published your first Smart contract locally and you have created a DApp sufficient to interact with it.
Vue.JS 🔗
I also added a mini Vue application + Web3.js:

